Installation
Buffy functions by monitoring events that are sent from a GitHub repository (e.g., openjournals/joss-reviews). Based on the information in these events, Buffy determines whether and how to respond by passing the event data to different Responders.
You can fork Buffy and configure the responders you want to use for a particular repository, and the fork doesn’t necessarily need to be hosted under the same GitHub user or organization (as the repository where it will be used). For Buffy to be operational, it must be running either through a local installation or deployment to a platform. The following components are necessary for this setup:
A GitHub user with administrative permissions on the target repository (typically a member of the organization that owns the repository) is required to act as the bot.
An instance of Buffy running
A webhook configured in the settings of the GitHub repository that will send events to Buffy (e.g., a
reviewsrepository).
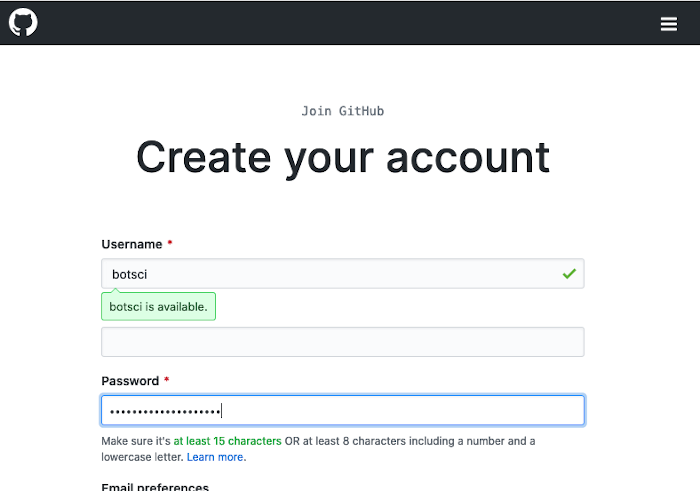
Create the bot GitHub user
This will be the “user” responding to the commands issued from a reviews repository.
1. Sign up at GitHub and create the bot user:
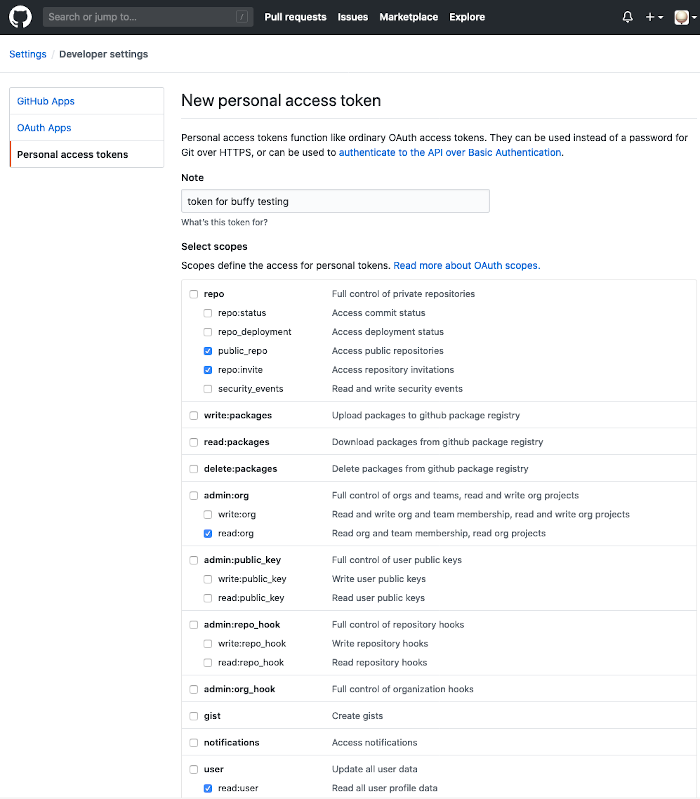
2. Go to Settings >> Developer settings >> Personal access tokens and create a new token with these scopes: public_repo, repo:invite, read:org, read:user and, if using the approval responder, admin:org (as the app will create teams and invite members to the ropensci organization). Save that token, it will be your BUFFY_GH_ACCESS_TOKEN.
3. Give the bot admin permissions: add it as member of the organization owning the repo where the reviews will take place:

Deploy Buffy
Server requirements
Some applications and services must be available to use by Buffy:
Deployment
As an example, we will use Heroku to deploy Buffy. However, any other server or platform can also be used.
1. To begin, create a new app in Heroku linked to the URL of your Buffy fork. Heroku will automatically use the heroku/ruby buildpack.
To process background jobs, Buffy needs a
redisadd-on, such as Heroku Redis or RedisGreen etc.You can use this Heroku buildpack to install the
clocdependency.
2. In the app settings add the following Config Vars:
    BUFFY_BOT_GH_USER: <the_github_username_of_the_bot>
    BUFFY_GH_ACCESS_TOKEN: <the_access_token_for_the_bot_created_in_the_previous_step>
    BUFFY_GH_SECRET_TOKEN: <a_random_string>
    RACK_ENV: production
2b. You can set the Ruby version to install using the CUSTOM_RUBY_VERSION env var. Unless you need any other specific version, please add also a Config Var named CUSTOM_RUBY_VERSION with the value of the latest version listed in the Buffy tested Ruby versions.
3. You can set Heroku to automatically redeploy when new commits are added. You can also add heroku as a git remote and deploy manually using
$ git push heroku main
There are detailed instructions in the Deploy section of your Heroku app.
4. At this point, you should have a public URL pointing to your new Buffy app! To confirm this, you can test it by visiting https://your-new-buffy-deploy.herokuapp.com/status. On success, you should see a basic (up and running) message confirming that Buffy is up and running.
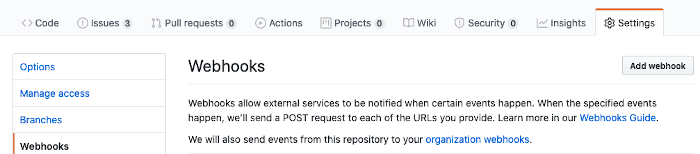
Configure a webhook to send events from GitHub to Buffy
1. Navigate to the settings page of the repository that Buffy will be listening to and add a new webhook.
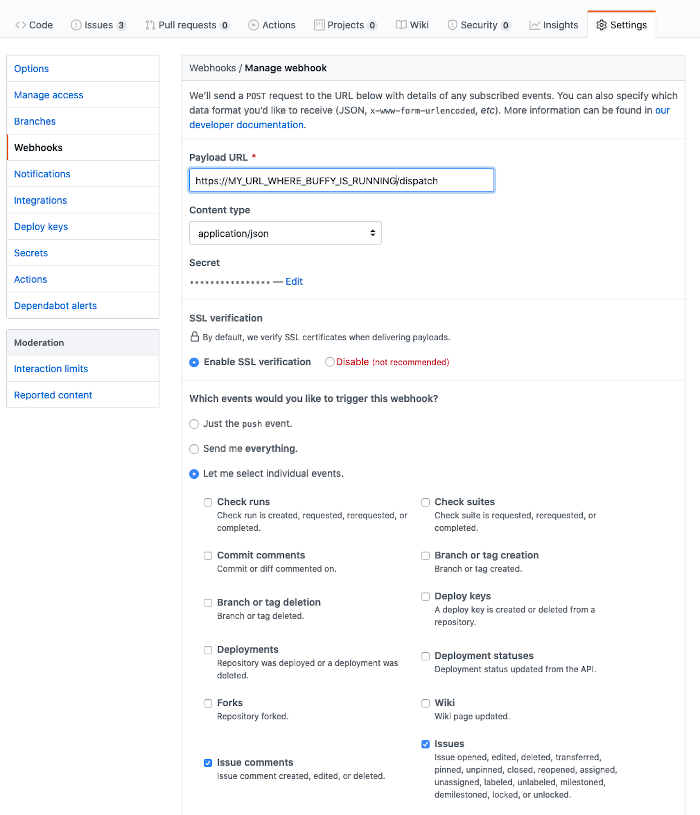
2. Set up the new webhook with the following configuration:
    Payload URL: /dispatch path at your public buffy url
    Content type: application/json
    Secret: The BUFFY_GH_SECRET_TOKEN you configured in the previous step
Select individual events to trigger: issue comments and issues
Assuming everything went smoothly, your Buffy instance should now be responding to review issues. You can test this by sending the @botname help command from a reviews issue to verify that the bot is functioning as expected.